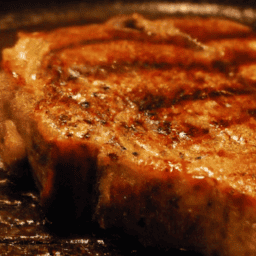
How To Cook Steak On Stove
In this article, you will learn the simple yet effective technique of cooking a delicious steak on the stove. Discover the step-by-step process that ensures mouthwatering results every time you crave a juicy and tender steak. You don’t need fancy equipment or a backyard grill – with just a stove, a skillet, and a few key ingredients, you’ll be able to impress your friends and family with your culinary skills. Get ready to savor the incredible flavors of perfectly cooked steak right in the comfort of your own kitchen.
Choosing the Right Steak
When it comes to cooking the perfect steak on the stove, choosing the right cut of meat is crucial. Different cuts of steak offer different flavors and textures, so it’s important to consider your personal preferences. Some popular choices include ribeye, striploin, filet mignon, and T-bone. Each cut has its own unique characteristics that can enhance your dining experience. Take the time to research and understand the qualities of each cut before making your decision.
In addition to considering the cut, you should also look for marbling in your steak. Marbling refers to the small streaks of fat that are interspersed throughout the meat. This fat helps to keep the steak moist and adds flavor during cooking. Look for steaks with even distribution of fat, as this will result in a more tender and flavorful dining experience.
Another factor to consider when choosing the right steak is its thickness. The thickness of the steak can influence the cooking time and the overall doneness of the meat. Thicker steaks generally require longer cooking times to achieve the desired level of doneness. On the other hand, thinner steaks cook more quickly and may result in a different texture. Consider your own preferences and the cooking time you have available when selecting the thickness of your steak.
Lastly, it’s important to determine how much steak to buy. This will depend on a few factors, such as how many people you’re cooking for and whether you want leftovers. As a general rule of thumb, plan for about 8 ounces (225 grams) of steak per person. However, if you’re serving a crowd or prefer larger portions, adjust accordingly. It’s always better to have a little extra than to run out!
Preparing the Steak for Cooking
Before you start cooking your steak, there are a few important steps to take to ensure the best possible results. One of the first things you should do is bring your steak to room temperature. Allowing the steak to sit at room temperature for about 30 minutes before cooking helps it cook more evenly. This process ensures that the steak cooks uniformly, resulting in a perfectly tender and juicy piece of meat.
After bringing the steak to room temperature, it’s time to season it. Seasoning enhances the natural flavors of the steak and adds depth to the overall taste. Keep it simple by using salt and pepper, or get creative with your favorite steak rub or marinade. Experiment with different seasonings to find your perfect flavor combination.
Speaking of marinades, marinating the steak can add even more flavor. Marinating involves soaking the steak in a flavored liquid for a period of time before cooking. This technique allows the flavors to penetrate the meat, resulting in a delicious and tender steak. Popular marinade options include soy sauce, Worcestershire sauce, garlic, and herbs. Be sure to allow enough time for the marinade to work its magic – a minimum of 30 minutes, but overnight is even better for maximum flavor infusion.
Before cooking the steak, it’s important to dry the surface. Excess moisture can hamper the searing process and make it difficult to achieve a flavorful crust on the outside of the steak. Pat the steak dry with paper towels to remove any moisture. This step will help you achieve a nice and crispy exterior while keeping the inside moist and tender.
Gather Necessary Tools
To cook your steak on the stove, you’ll need a few essential tools. Let’s go through each one to ensure you’re properly equipped for a successful cooking experience.
Firstly, you’ll need to choose a suitable pan for cooking your steak. A heavy-bottomed skillet or a cast-iron pan is ideal for stovetop cooking. These pans distribute heat evenly and retain heat well, allowing for optimal searing on the stove. Additionally, make sure your pan is large enough to comfortably accommodate the size of your steak.
Next, it’s important to have a reliable meat thermometer on hand. This tool will help you gauge the doneness of your steak accurately. Whether you prefer your steak rare, medium-rare, medium, or well-done, a meat thermometer will ensure you cook it to your desired level of doneness.
When it comes to handling your steak, a good pair of tongs is essential. Tongs provide a firm grip on the steak, allowing you to flip it easily and move it around the pan without piercing it and releasing valuable juices. Look for tongs with long handles to keep your hands safe from the heat.
Lastly, investing in a pair of heat-resistant gloves is highly recommended. These gloves provide protection when handling hot pans or moving them in and out of the oven. They are also useful when searing your steak at high temperatures, preventing any accidental burns.
Preheating the Pan
Preheating the pan is an essential step in cooking the perfect steak on the stove. It allows the pan to reach the desired temperature before placing the steak in it, ensuring a proper sear and optimal flavor development.
There are a couple of reasons why preheating is important. First, it helps to cook the steak more evenly. By preheating the pan, you create a consistent cooking surface, which promotes even heat distribution. This results in a steak that is cooked uniformly from edge to center.
Secondly, preheating allows the steak to sear properly. When the steak hits the hot pan, it creates a caramelized crust on the surface, which enhances the flavor and textures of the meat. Without a preheated pan, you may end up with a steak that lacks that desirable crust.
So, how can you tell when the pan is ready? One way to test the temperature is by flicking a few drops of water onto the surface. If the water sizzles and evaporates almost instantly, your pan is likely hot enough. Another method is to heat the pan over medium-high heat for a few minutes until it’s hot, then hold your hand about 6 inches above the surface. If you can feel the heat radiating, the pan is ready to go.
Keep in mind that different stovetops and pans may have slight variations in cooking times and temperatures. It may take a little trial and error to find the perfect preheating time for your specific setup.
Cooking the Steak
Now that you’ve preheated your pan and gathered all your tools, it’s time to cook the steak! Follow these steps for a perfectly cooked piece of meat:
-
Moving the steak to the pan: Carefully place the seasoned steak into the preheated pan using your tongs. Be sure to lay it away from you to prevent any potential splatters. Allow the first side to cook undisturbed for a few minutes to develop a rich sear.
-
When to flip the steak: Once the first side has achieved a caramelized crust, it’s time to flip the steak. Use your tongs to turn it over gently. The exact cooking time will depend on the thickness of your steak and your desired level of doneness. As a general guide, aim for approximately 4 to 5 minutes per side for medium-rare. Adjust the cooking time as necessary to achieve your preferred level of doneness.
-
Seizing the steak: When cooking your steak on the stove, you have the option to add extra flavor by seizing it. Seizing involves briefly lifting the steak with the tongs and rotating it to cook the edges. This step can help create a beautiful, evenly browned crust around the entire steak.
-
Testing doneness with a thermometer: To ensure your steak is cooked to your desired level, it’s important to use a meat thermometer. Insert the thermometer into the center of the thickest part of the steak, away from any bones or the pan’s surface. Refer to a temperature guide to determine the appropriate reading for your desired level of doneness. Remember, the temperature will continue to rise a few degrees during the resting period.
Managing the Heat
As you cook your steak on the stove, managing the heat is crucial to achieve the perfect result. Different cuts of steak may require adjustments to the heat to ensure optimal cooking.
For thicker cuts of steak, you may need to lower the heat slightly after the initial sear to allow the inside to cook through properly without burning the exterior. This technique prevents the steak from becoming too charred on the outside while still achieving your desired level of doneness.
It’s also important to manage the smoking points of different cooking fats. When it comes to searing your steak, it’s recommended to use fats with high smoke points, such as canola oil or avocado oil. These oils can withstand high temperatures without breaking down or producing an unpleasant burned taste.
To prevent overheating, keep a close eye on the pan and adjust the heat as necessary. If you notice the pan becoming too hot and smoking excessively, reduce the heat slightly to avoid scorching or burning your steak. Remember, patience is key when cooking steak on the stove.
For an additional burst of flavor, consider adding a pat of butter to the pan towards the end of cooking. This will infuse the steak with a rich and savory taste, enhancing its overall deliciousness.
Resting the Steak
Resting the steak after cooking is a crucial step that should never be overlooked. Resting allows the juices to redistribute throughout the steak, resulting in a tender and juicy final product.
But why is resting so important? When meat cooks, the heat causes the juices to collect in the center. Resting allows these juices to redistribute, leading to a more evenly moist and flavorful steak. If you cut into the steak immediately after cooking, you risk losing these precious juices, resulting in a drier and less tasty steak.
The length of time you should let your steak rest depends on its thickness. As a general guideline, allow your steak to rest for about 5 to 10 minutes. Thicker cuts may benefit from a slightly longer resting time, while thinner cuts may need less time. Use your judgment and experience to determine the ideal resting period for your specific steak.
While resting, it’s best to cover the steak loosely with aluminum foil. This helps to insulate the steak and keep it warm without trapping in too much heat. Avoid wrapping the steak tightly, as this can cause condensation to form, potentially affecting the crust you worked so hard to achieve.
After the rest period, you can use a meat thermometer to test for doneness. Insert the thermometer into the thickest part of the steak, and it should give you a reliable reading. The steak will continue to cook slightly during the rest, so keep that in mind when determining your desired level of doneness.
Searing the Steak
Searing the steak is another crucial step that can take your cooking to the next level. Searing creates a flavorful crust on the outside of the steak, adding depth and complexity to the overall taste.
So when should you sear your steak? The answer depends on personal preference and the type of crust you want to achieve. You have a couple of options:
-
Sear before cooking: Some chefs prefer to sear the steak first and then finish cooking it in the oven or on the stovetop. This method allows for a deeply caramelized crust while ensuring the inside of the steak is cooked to perfection.
-
Sear after cooking: Alternatively, you can also choose to sear the steak after it’s cooked to your desired level of doneness. This method can enhance the flavor by adding an extra layer of richness and browning to the surface of the steak.
No matter which method you choose, here’s how to sear your steak:
-
Heat some oil or butter in the pan over medium-high heat until it begins to shimmer.
-
Carefully place the cooked steak into the pan and let it sear for a few minutes on each side, turning occasionally. This process helps caramelize the surface, creating a beautiful crust.
-
While searing, you can add minced garlic and herbs to the pan for added flavor. The garlic and herbs will infuse the oil or butter, creating a delicious aromatic experience.
Remember to keep a close eye on the steak while searing to avoid burning or overcooking. Achieving the perfect sear takes practice, so don’t be discouraged if you don’t get it right on your first attempt. Practice and experience will help you master this technique.
Cleaning and Care of Cookware
After you’ve enjoyed your delicious steak, it’s time to clean and care for your cookware. Proper maintenance will ensure the longevity and performance of your pans.
When handling a hot pan, always remember to use oven mitts or heat-resistant gloves. This protects your hands from burns and helps you maneuver the pans safely. Make sure to place the hot pan on a heat-resistant surface, such as a trivet or a cooling rack, to protect your countertops.
After cooking, you may notice fond, which is the browned bits of flavor-packed residue stuck to the bottom of the pan. Don’t let these go to waste! Deglazing the pan is a great way to capture that delicious flavor and create a sauce. Simply pour a small amount of liquid, such as wine, broth, or water, into the pan while it’s still hot. Use a spatula or wooden spoon to scrape up the fond and incorporate it into the liquid. This flavorful liquid can then be used as a base for a sauce or poured over the steak for added flavor.
To clean the pan, start by removing any remaining food particles with a spatula or scraper. Then, use warm water and a gentle dish soap to clean the surface. Avoid using harsh scrub brushes or abrasive materials that can damage the pan’s seasoning or non-stick coating. Once clean, dry the pan thoroughly to prevent any rust or damage.
To store your pan properly, make sure it is completely dry before placing it in a cabinet or drawer. Storing a damp pan can lead to rust or other forms of damage. If your pan has a non-stick coating, it’s best to use a pan protector or a soft cloth to separate it from other pans. This helps prevent scratching or chipping of the non-stick surface.
Practical Tips and Tricks
As you continue your journey of cooking steak on the stove, here are some practical tips and tricks to enhance your overall experience:
Preventing oil splatters: To prevent oil splatters while searing, dry the surface of the steak thoroughly and avoid using excessive amounts of oil. You can also lightly coat the steak in flour before searing to create a protective barrier.
Pairing with side dishes: The steak is the star of the show, but don’t forget about the supporting cast! Consider pairing your steak with delicious side dishes like roasted vegetables, mashed potatoes, or a refreshing salad to create a well-rounded meal.
Reheating leftovers: If you have leftover steak, it’s important to reheat it properly to maintain its tenderness and flavor. Avoid using the microwave, as it can result in an uneven reheating process. Instead, gently heat the steak in a skillet over low heat, adding a small amount of liquid or butter to help retain moisture.
Common mistakes to avoid: Overcooking, underseasoning, and not allowing the steak to rest are common mistakes to avoid. Pay attention to cooking times, always taste and adjust the seasoning, and be patient during the resting process. These steps can make a world of difference in the final outcome of your steak.
By following these tips and tricks, you’ll be well-equipped to cook a delicious and satisfying steak on the stove every time. Experiment with different cuts, seasonings, and cooking techniques to find your own personal steak-cooking style. With practice and a friendly mindset, you’ll be impressing your friends and family with your stovetop steak mastery in no time!