How To Cook And Freeze Corn On The Cob
Have you ever had an abundance of fresh corn on the cob and wondered what to do with it all? Look no further, because this article will show you everything you need to know about how to cook and freeze corn on the cob. Whether you want to enjoy it now or save it for later, we’ve got you covered with simple and effective methods to preserve the deliciousness of this summer favorite. Get ready to savor the taste of sweet corn all year round!
Selecting the Right Corn
When it comes to cooking and freezing corn on the cob, selecting the right corn is crucial. You want to choose fresh and ripe corn to ensure the best flavor and texture in your finished product.
Choosing Fresh Corn
To choose fresh corn, look for ears that have bright green husks that are still tightly wrapped around the corn. Gently squeeze the ear of corn to feel for plump and firm kernels. Avoid any ears that have brown or dry husks, as this may be an indication of older and less fresh corn.
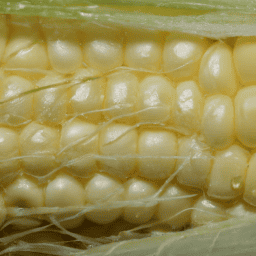
Checking for Ripeness
While selecting fresh corn is important, it is equally essential to choose corn that is ripe. To check for ripeness, peel back a small section of the husk and look for plump and milky kernels. If the kernels are smaller and not fully formed, the corn may not be ripe yet, and it’s best to choose another ear. It’s also helpful to note that corn is at its peak ripeness during the summer months.
Understanding Corn Varieties
Corn comes in various varieties, such as sweet corn, field corn, and popcorn. For cooking and freezing, sweet corn is the preferred choice. It is known for its tender and sweet kernels, making it perfect for eating right off the cob or adding to dishes. Field corn, on the other hand, is primarily used for animal feed or processed into cornmeal and other products. Popcorn is specifically cultivated for popping, rather than eating off the cob or freezing.
Preparing for the Process
Before diving into the cooking and freezing process, it’s important to gather the necessary equipment and set up your workspace.
Gathering Necessary Equipment
To cook and freeze corn on the cob, you will need a large pot for boiling the corn, a sharp knife for cutting the corn off the cob if desired, freezer bags or containers for storage, and a strainer or colander for draining the corn after blanching. It’s also helpful to have a cutting board and kitchen towels for prep work.
Setting up Your Workspace
Before you begin cooking, make sure your workspace is clean and organized. Clear any clutter, sanitize your countertops, and make sure you have enough space to work comfortably. This will make the process much smoother and more enjoyable.
Cleaning the Corn
Properly cleaning the corn is an essential step in the cooking and freezing process. It ensures that any dirt, debris, or pesticides are removed before consumption.
Removing Husks and Silk
Start by removing the husks from the corn. Peel back the husks one at a time, working your way down the cob until all the husks are removed. Next, remove the silk from each ear of corn by either gently pulling it off with your hands or using a damp cloth to wipe it away.
Washing the Corn
Once the husks and silk have been removed, it’s a good idea to give the corn a thorough wash. Rinse each ear of corn under cool running water to remove any remaining silk or debris. This step helps ensure that your corn is clean and ready for blanching.
Blanching the Corn
Blanching is a crucial step in the cooking and freezing process as it helps preserve the flavor and texture of the corn.
Understanding the Blanching Process
Blanching involves briefly boiling the corn in water, then immediately cooling it down in ice water. This process stops enzyme activity in the corn, preventing it from deteriorating during freezing. It also helps retain the corn’s color and nutrients.
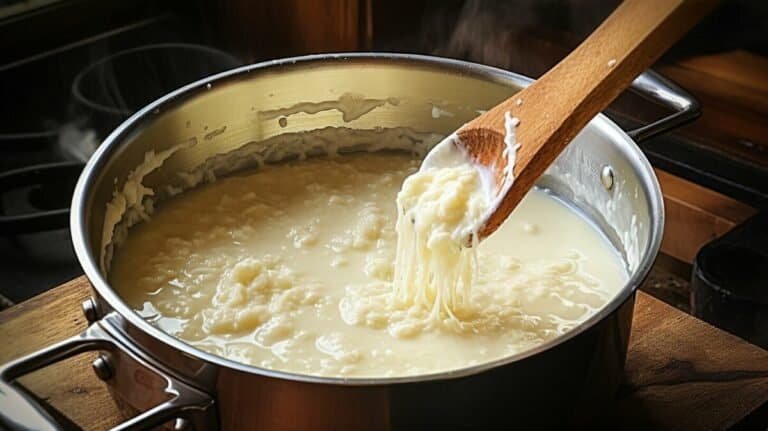
Proper Boiling Techniques
To blanch the corn, fill a large pot with water and bring it to a rolling boil. Carefully place the corn in the boiling water and cook for about 4 to 6 minutes. Keep in mind that larger ears of corn may require slightly longer cooking times. Once the corn is blanched, promptly transfer it to a bowl of ice water to cool down.
Cooling and Draining the Corn
After the corn has been blanched and cooled in ice water, drain it thoroughly. Remove the cooled corn from the ice water and place it in a strainer or colander. Allow any excess water to drain off before proceeding to the next step.
Preparing the Corn for Freezing
Once the corn has been blanched and drained, it’s time to prepare it for freezing. There are two main options – cutting the corn off the cob or leaving it whole.
Cutting Corn off Cob versus Leaving it Whole
If you prefer to have whole corn on the cob when serving, you can simply leave the corn as is. Make sure to wrap each ear tightly in plastic wrap or aluminum foil before placing it in a freezer bag or container. For easier storage and versatility in using the corn, cutting it off the cob is a popular choice. Use a sharp knife to carefully cut the kernels off the cob. Collect the kernels in a bowl or directly into freezer bags.
Packing Corn into Bags
When packing corn into freezer bags, make sure to remove as much air as possible before sealing. This helps prevent freezer burn and preserves the quality of the corn. Alternatively, if you prefer to use containers, choose airtight containers specifically designed for freezing.
Understanding the Freezing Process
Freezing corn is a fantastic way to preserve its freshness and enjoy it throughout the year. Understanding the freezing process is essential to maintain the quality of the corn.
What Freezing Does to Corn
When you freeze corn, the low temperature causes the water in the corn to turn into ice crystals. These ice crystals help preserve the corn by preventing the growth of bacteria and slowing down degradation. Freezing also helps retain the corn’s flavor and texture for an extended period.
Optimal Freezing Temperature
To ensure the best results, it is recommended to freeze corn at a temperature of 0°F (-18°C) or below. This temperature helps maintain the quality and longevity of the corn.
Storing Frozen Corn
Proper storage is crucial to maintain the flavor and texture of frozen corn.
Suitable Storage Containers
When storing frozen corn, choose containers or freezer bags specifically designed for freezing. These containers should be airtight to prevent freezer burn and to keep out any unwanted odors. Clearly label each container or bag with the date of freezing for easy tracking.
Choosing the Best Freezer Location
The location of your frozen corn within the freezer can also impact its quality. Place the corn in the coldest part of the freezer, away from the door, as this area experiences less temperature fluctuation. Avoid overcrowding the freezer and leave enough space around the containers or bags to allow for proper air circulation.
Thawing and Reheating Corn
When you’re ready to enjoy the frozen corn, proper thawing and reheating methods will ensure the best taste and texture.
Defrosting Frozen Corn
To thaw frozen corn, transfer it to the refrigerator and allow it to thaw overnight. This gradual thawing process helps retain the corn’s quality by avoiding temperature shock. If you’re in a hurry, you can also use the defrost function on your microwave.
Reheating Methods
Once the corn is thawed, you can choose to eat it cold or reheat it. To warm up the corn, you have several options: stovetop, microwave, or oven. For stovetop reheating, you can gently steam the corn in a pot with a little water. Microwave reheating is quick and convenient – simply place the corn in a microwave-safe dish with a bit of water and heat in short increments, stirring occasionally. If you prefer the oven, wrap the corn in foil and bake at a low temperature until heated through.
Serving Suggestions
When the corn is thawed and reheated, it’s time to enjoy this delicious treat. You can serve it as a side dish with butter and seasoning, incorporate it into salads or soups, or even use it as a topping for pizzas or tacos. The possibilities are endless!
Addressing Common Freezing Problems
While freezing corn is a great way to preserve it, a few common problems may arise. Here are some tips to address them:
Freezer Burn Prevention
To prevent freezer burn, which can affect the quality of the corn, make sure to remove as much air as possible from the containers or bags before freezing. Additionally, using high-quality freezer bags or airtight containers and selecting the coldest part of the freezer for storage will help minimize freezer burn.
Longevity and Use-by Dates
Frozen corn is best enjoyed within 8 to 12 months of freezing for optimal quality. After this time, the corn may still be safe to eat but the flavor and texture may deteriorate. Label each container or bag with the date of freezing, and make sure to use the oldest ones first to avoid any waste.
Benefits of Freezing Corn
The process of cooking and freezing corn on the cob offers several benefits that make it a popular preservation method.
Preserving Freshness
By cooking and freezing corn at its peak ripeness, you can enjoy its delicious taste and texture long after the harvest season. Frozen corn retains its freshness and nutrients, providing a taste of summer even during the colder months.
Convenience for Future Meals
One of the greatest advantages of freezing corn is the convenience it offers. With frozen corn readily available in your freezer, you can easily add it to a variety of recipes or enjoy it as a standalone side dish with minimal preparation. It saves time and effort, making meal planning and cooking a breeze.
In conclusion, cooking and freezing corn on the cob is a simple and rewarding process. From selecting the right corn to properly storing it, following these steps will allow you to enjoy delicious corn all year round. With the convenience and versatility of frozen corn, you can elevate your meals and savor the taste of summer whenever you crave it.